Blog
OpenEnergyMonitor

Testing DS18B20 temperature sensing on emonTx v3

Hello, so I thought Id try something new on this blog, I'm going to try writing short blog posts about progress and general work on things day to day, these are not intended to mark significant developments or milestones which many of the other blog posts have tended to be, something more like a log book that will hopefully give insight into the development process.

Testing DS18B20 temperature sensing on emonTx v3

Glyn and I with help from Robert are continuing with testing emontx V3, there have been a few niggling issues that we're working on but its pretty much there. This morning I tested the DS18B20 temperature sensor connection, it all worked fine, one of the nice things of the new emontx is that there are screw terminals for connecting up the temperature sensor which makes connecting up the encapsulated DS18B20 temperature sensors much easier.
DS18B20 connected to emontx v3
Another new addition for temperature sensing is the ability to switch the sensor power pin on and off for use when powering the emontx of batteries (this avoids the hack introduced in the low power temperature node that uses the emontx v2.2 pcb). Anyway the circuit was originally designed with analog 5 (used as digital pin 19) being used for data and digital 5 used for power. While reading about using analog inputs as digital pins I came across this note on the arduino site:

The Atmega datasheet also cautions against switching analog pins in
close temporal proximity to making A/D readings (analogRead) on other
analog pins. This can cause electrical noise and introduce jitter in
the analog system. It may be desirable, after manipulating analog pins
(in digital mode), to add a short delay before using analogRead() to
read other analog pins.


It turns out one can just switch the atmega pins used around so analog 5 (digital 19) is used for power and digital 5 is used for the data which will be higher frequency switching and so good to bring that off the analog pin. As power switching is only needed in battery operation one could make a temperature measurement after the analog read section just before putting the emontx to sleep which should not cause interference.

Update (15/06/13): On future emonTx V3 PCB revisions 3.x ADC 5 (Dig 19) and Dig5 have been swapped round on the PCB to fix this issue. Dig 5 is now DS18B20 one-wire signal and ADC5 (Dig19) is now DS18B20 power.

If no DS18B20 temperature sensor is connected the ports can be used for other functions. ADC 5 can be used as a analogue input/output and Dig 5 (with R27/R24 4.7K pull up removed) can be used as a general Digital I/O with PWM capabilities. 

The DS18B20 data 4.7K pull-up resistor on Dig 5 and the Dig 2 IRQ 10K pull-down resistor have been designed to take a thru-hole resistor if the SMT resistor was removed to make it possible to change the value of these resistors. 

Open Source Hardware Users Group (OSHUG) #26 Meetup

Last night I attended OSHUG event #26 in London and gave a short talk on Low Power Wireless sensors as well as the brief overview of the OpenMonitorProject and a quick look at what we've been working on recently.

There are a couple of new screenshots in the presentation from the open-source SAP building modelling emoncms module that Trystan is been working in with Manchester @CarbonCoop recently. This is an exciting bit of development. The idea is that the building model could be matched up to the monitoring results (temperature profile & heat input) of a building, the model could then be used to investigate the effect of undertaking improvement measures such as wall, loft insulation or external cladding etc.. Finally after completion of improvement measures the monitoring data can again be used to evaluate the actual performance of the improvement measures.


Osug #26 low power wireless sensors from OpenEnergyMonitor

It was great to meet everyone and put faces to (twitter) names! Big thanks to Andrew Back @9600 for organising the event and @skpang_uk for sponsoring the event...and buying me a beer afterwards!  

One Year of Solar PV Monitoring

On the 23rd November 2011 we have had a 2.9Kwp solar PV installed. 


We recently got our first payment from the UK's governments Feed In Tariff scheme. This has prompted me to take stock of how the system has been performing and how the data collected using the OpenEnergyMonitor energy monitoring system compares to the utility company's billing meter:

From the 23rd Nov 2011 - 23rd Nov 2012 the billing utility meter on the solar PV system has recorded a  generation of 2069 kWh. Over the same period we consumed 3588 Kwh, 57% of our electrical energy needs have been met by the solar PV. 

At this rate it looks like we're on track for the system to pay back in 7-8 years, maybe even less if we have some more sun in the next few years, fingers crossed! 

For the same time period the OpenEnergyMonitor monitoring system has recorded a generation of 2029 kWh, giving the energy monitor an accuracy of 98%! 

The monitoring system is a standard emonTx with an AC-AC adapter taking Real Power readings

One Year of PV Generation
Kwh/d Electricity Consumption (orange) Overlaid with Generation (blue) 

When the system was installed the solar PV company estimated we would produce 2434 Kwh per year, we generated 15% less than this estimate. This could partly be attributed to the very poor summer we experienced in 2012.

This year is already looking promising, on the 2nd of May 2013 our system generated a record (for us) of 18.3 Kwh 1.9 times more than we consumed on that day (9.7 Kwh):


Record Generation on 2nd May 2013
Fingers crossed for a sunny 2013 summer!

Carbon Coop

The weekend before last I went to Manchester to help Matt Fawcett and Jonathan Atkinson of Carbon coop with the EcoHome_Lab openenergymonitor energy monitor building workshop. I haven’t blogged about Carbon Co-op before so Id like to give a bit of an intro to who they are and why I think what they are doing is particularly exiting.

http://carbon.coop
I first met Matt who is responsible for the monitoring at Carbon Coop at a Cleanwebuk event in London after initially exchanging a few emails. Matt explained that they are working on a retrofit programme to try to prove that it is possible to cut between 60-80% of energy demand from homes because this is what we need to save.

They want monitoring to be at the centre of everything they do, so that their members can see how minor changes impact energy usage as well as more major retrofit changes. They also want to monitor internal air quality as well as temperature for early identification of any problems with the insulation and airtightness measures. By monitoring humidity, CO2 as well as temperature Matt explained that its possible to isolate issues around damp/cooking etc from issues around ventilation.

They are really keen to use open source technology because that then gives them the freedom to configure the system as they need and then get at the data. They are keen advocates for open data and open source software and hardware in general and carry out their own work in an open way.

Since then Carbon Coop have installed 18 openenergymonitor energy monitors in houses across Manchester, held two energy monitor workshops including last weekends and are going forward with retrofitting 15 houses to between 60 and 80% carbon reduction.

Building monitors at the Carbon Coop EcoHomeLab workshop 19th-20th April 
What I really like about Carbon Coop is the way they are working on every part of the process: They start with the larger picture of what we need to do in terms of sustainable energy in housing and then go from there to work on an individual household basis, first carrying out a detailed whole house assessment based on the governments SAP (standard assessment procedure) to identify where most energy is being lost, which improvements would have the biggest effect and what to do first. They’re using the energy monitoring to provide feedback to households as described above. From there they go on to help households carry out work on their houses, from finding the best way to finance retrofit measures to working with architects and local tradespeople. Once the retrofit building works are complete they continue to monitor to ensure that the changes reach the predicted energy targets. They do all this using an open source approach, they are also a co-operative that is open for people to join. They are a really switched on group of people, carrying out their work in a thorough, thoughtful, evidence based way.

Every-time I go to visit them I come back inspired to develop things further. One of the highlights of the last visit was listening to Eleni Kalkantzi who works for URBED (Carbon Coop's technical partner) talk about the whole house assessment methodology and reports she, Charlie Baker and Marianne Heaslip have developed. A huge amount of work has clearly gone into these reports and the assessment method, they have an example report and report on the assessment method here:

See their example assessment here: http://carbon.coop/assessments/CC_EXAMPLE_ASSESSMENT2.pdf

Report on the assessment method: http://carbon.coop/assessments/URBED_ASSESSMENT_REPORT.pdf

They see the next step being to integrate monitoring data directly in to the SAP model on which their reporting is based to reduce the number of assumptions made. This is where the open source emoncms SAP model that we have been developing comes in but I will come back to that in another post.

Introducing the RFM12Pi V2 - Raspberry Pi Wireless Expansion Board

Since, November last year we have more and more been leaning towards using a Raspberry Pi as our web connected base station of choice. See here for our original blog post on using the Raspberry Pi as an emoncms logging  and visualisation server.

Here is the latest version of the RFM12Pi Raspberry Pi wireless expansion board. Like the V1 the RFM12Pi V2 allows the Raspberry Pi to receive and transmit data via RFM12B 433/868mhz from and to other wireless nodes such as the emonTx, emonGLCD and Remote Temperature nodes.

RFM12Pi V2 - Raspberry Pi Expansion Board

The RFM12Pi V2 is now for sale in the OpenEnergyMonitor online shop, it comes pre-assembled and ready loaded with firmware, when used in conjunction with the read-to-go emoncms Raspberry Pi SD card image it makes for a truly plug-and-play energy monitor web-connected base-station setup. We're also selling a PCB only version and of course the hardware design, Arduino based firmware all Raspberry Pi emoncms setup is all open-source.


For the ultimate super-quick and easy setup we have also made available pre-loaded Emoncms Raspberry Pi SD cards
Emoncms Raspberry Pi Pre-loaded SD card 

The new features of the RFM12Pi V2 are:
  • ATmega328 based, has more memory and hardware serial support
  • Using the ATmega328 hardware serial (+optiboot) and AVRdude (pre-installed on SD card image) it's possible to upgrade the firmware on the RFM12Pi V2 direct from Raspberry Pi, instructions are on the wiki.
  • Runs on ATmega328 internal 8Mhz oscillator (to save unnecessary components)
  • SMT used, board layout is optimised for pick-and-place assembly
  • Lower profile to fit inside most Raspberry Pi enclosures
See the the RFM12Pi V2 wiki for more technical details regarding the hardware and firmware.

To get up and running all that's needed is to connect the RFM12Pi onto the Raspberry Pi's GPIO pins, insert the pre-build SD card and bootup the Pi. Once booted up browse to the Pi's local IP address or the host name (http://emoncmspi) and then configure the RFM12B network setting from within emoncms.

emoncms Raspberry Pi Module Config Page


Monitoring data is logged to the Raspberry Pi's SD card and can be mirrored to emoncms.org or any other emoncms server for backup and remote viewing. The Raspberry Pi is powerful enough to be able to serve emoncms graphs and widgets.

emoncms dashboard served from the Raspberry Pi - viewed on a Nexus 7 Tablet 

Pictures from the OpenEnergyMonitor CAT course

A couple of weeks ago we held our first openenergymonitor course at the Center for Alternative Technology in Mid Wales. It was well attended with 17 of us in total including tutors: myself, Carlos and Suneil. We where also lucky to have Robin Emley come down to demo his MK2 Surplus PV diverter and lend a helping hand.

Here are a few pictures of everyone getting stuck in with building emontx's and rfm12pi adapter boards:


Carlos and Sebastian who came all the way from Germany going through the Raspberry PI setup process:


Robin Emley helping out above and his solar pv diversion setup below:


The course was held in the beautiful Welsh Institute for Sustainable Education (WISE)  building at CAT:


I'm in Manchester this coming weekend (20th April) helping Matt Fawcett and the rest of the Carbon Coop team with their: Ecohome lab launch workshop and build day. Looking forward to it.


Course at the Centre for Alternative Technology

by Carlos Alonso Gabizón

Open Source Tools For Energy Monitoring

25th - 28th March

When working towards sustainable energy it is important that we work towards it in a way that adds up. Energy monitoring is a vital tool for helping us do this from measuring our home electricity consumption to working out the performance of sustainable heating systems.
During this short workshop we will explore and build monitoring solutions that are based on open source technology developed as part of the openenergymonitor.org online research project. Solutions that can be configured for a wide range of applications including:
  • Household Electricity monitoring
  • Heat-pump monitoring
  • Solar PV generation monitoring
The workshop will focus around a practical case study of monitoring electricity generation and use at the Centre for Alternative Technology designing a public energy display to engage visitors that can be accessed both at the site and on the web.

Workshop content outline


Course tutors

Carlos Alonso Gabizón – Is the course leader. Worked on microgrid energy display project at CAT and open source software for extracting energy data from PV inverter equipment. Carlos has an electronic engineering and computer science background.
Trystan Lea – As a core developer on the openenergymonitor project Trystan will be introducing the hardware and software workshops. Trystan codeveloped with Glyn Hudson many of the main elements of the openenergymonitor system with a focus on software and firmware including emoncms an open source web application for energy visualisation. Trystan also runs the openenergymonitor kit shop with Glyn Hudson.Trystan has a Physics background with a BSc in Physics at Cardiff University.
Suneil Tagore – Will be giving an introduction to open source 3D fabrication/printing using the reprap. Suneil has also worked on DC monitoring for theHugh Piggot wind turbine. Suneil has a background in Engineering andcomputer science with an MEng in Engineering at UCL London and a MSc inComputer Science at Cardiff University.

Course cost and how to book

The course cost is £520. Concession: £340 (unemployed, retired or full time student). This covers accommodation, food and course tuition.
You can reserve a place on the course online at: courses.cat.org.uk/ or by phone calling the CAT Courses Department on 01654 704 952.

What will you get from this course?

Firstly, the knowledge and practical skills to build and set up a monitor solution based in the openenergymonitor kit and how to expand its functionality beyond what is done in the course.
Secondly, you will be able to install emonCMS, set it up and create really nice visualizations.
And lastly but more exciting than the previous, you will take home your own energy monitor completely ready to use!!!

emonTx SMT update > Introducing emonTx V3

If you're a regular follower of our blog you might remember towards the end of the summer of last year (2012) we posted up a design of an emonTx SMT (pre-assembled using surface mount electronics).

Since that original post progress on the new design has been rather slow (I've been trying to document progress on this forum thread). Slow progress has mainly been due to the success of the shop! Order fulfilment, stock organisation and administration has been taking up most of our time. However, we have built a prototype emonTx SMT with the original design from Aug 2012. The functions tested so far have worked well. Although we are yet to do a proper accuracy test, however we are confident that it will perform well as it's based on the Atmel energy monitor app note.

emonTx SMT prototype
The original emonTx SMT was designed with high accuracy and flexibility (everything but the kitchen sink on one PCB!) in mind. However being a complex design with many components assembly costs will be high. At some stage in the future we would like to get it manufactured but we feel that a lower cost less complex board with comparable performance to the current emonTx but in SMT form and nicely cased will be more suitable as a next step for us. The performance of the current emonTx is adequate for most monitoring applications and with real power monitoring performance is better than most domestic energy monitors currently on the market.

**

Introducing the emonTx V3:


emonTx V3 prototype CAD design

The form factor is the same as the emonTx SMT design. It's been designed to fit in a wall mountable extruded aluminium case with laser cut plastic fascia for the openings. 

emonTx V3 case mockup

The energy monitoring parts of the emonTx V3 are the same as the current emonTx but using SMT components. However unlike the original emonTx (V2) we have put effort into designing the PCB with best analogue performance in mind, time will tell if this will result in improved performance:


emonTx V3 analogue performance design considerations 

We have added an extra 'high sensitivity' reduced range CT channel to be used to monitor up to 4.5kW (@240V). Reducing the monitoring range by using a higher value burden resistor increase the sensitivity when monitoring lower power levels. This channel will be perfect for monitoring single circuits or appliances e.g. solar PV output, heatpump power etc.

Like on the emonTx SMT the emonTx V3 will have the option to be powered from a single AC-AC adapter using a AC-DC half-wave rectifier circuit (see blog post part1 and part2). This circuit has been carefully designed so that it does not effect the quality of the AC sample wave form. Being able to use only one power adapter to power the unit and simultaneously provide an AC voltage sample to be used for Real Power, Vrms, Power Factor and frequency measurements will reduce the cost and overall embodied energy of the system.

The 'heart' of the emonTx V3 is provided by an Rfu. An Rfu is a tiny little Atmega328 with a radio in an SMT XBEE footprint (the final design will also have thru-hole Xbee pads). 

Ciseco RFu - ATmega328 plus RFM12B 
Ciseco RFu - ATmega328 witth SRF radio

The RFu has been designed and manufactured in the UK by Ciseco. The radio on the Rfu can be an RFM12B or SRF. We will be using the RFM12B, but it's nice to have a 'drop-in' option for a different radio. Using the Rfu makes the emonTx V3 more modular and it will allow us to manufacture the emonTx V3 easier and cheaper. As with the current emonTx the ATmega328 will be programmable using an FTDI and the Arduino IDE.

A barebone emonTx V3 prototype PCB arrived from PCB Train over the weekend, if all goes well we should have a working prototype by the end of the week. Fingers crossed! 

emonTx V3 prototype PCB


Ideas for improving the emoncms framework

I've been looking again at writing the developer documentation for emoncms, in particular Id like to document how to build the core framework from scratch, explaining the design decisions and implementation of things like the front controller, modules folder structure, MVC pattern.

In doing this exercise and reading up more widely about the various parts I started to get ideas for improvements.

1) Changing the controller structure to better reflect the client side javascript nature of views

The first insight I had followed from reading Jean Claude Wipplers post about really going all the way with client side javascript (and server side for that matter :) using angular js and other technologies: http://jeelabs.org/2013/01/07/technology-decisions/ "...Think about the change in mindset: no server-side templating… n o n e !"

Emoncms UI is already largely client-side javascript with javascript making 41% of the emoncms code base. But there are still quite a few parts that are generated by server-side templating - the user account page being one notable example.

The framework was initially built with server side templating in mind with the result of the model being passed to a view and the view being constructed with php. The current emoncms application architecture documentation page reflects this idea, see the Views section in particular which shows a minimal example of creating a feed list using php.

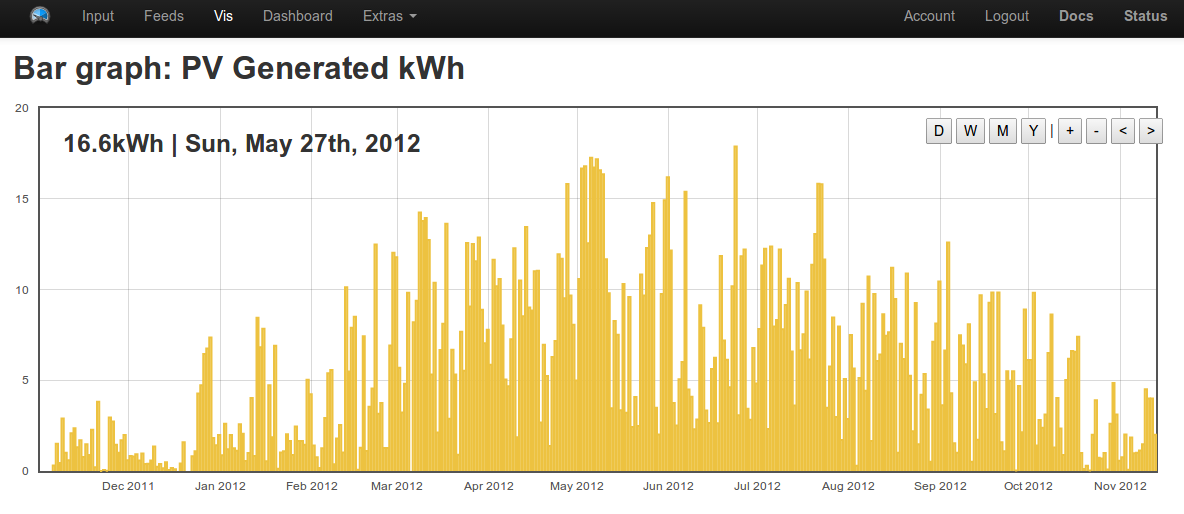
However the way the feed list view is actually made in emoncms is using client side javascript to create a dynamic view that shows the feeds updating in realtime. The feed list data is requested from the server using jquery AJAX every 5 seconds.

Letting go of the idea that we might want to do server side php templating for most of the module views and reassessing the framework controller code in particular, the following as described on the controller part of the application architecture page no longer makes much sense:

if ($action == 'list' && $_SESSION['read'])
{
  $feeds = get_user_feeds($_SESSION['userid']);

  if ($format == 'json') $output = json_encode($feeds);
  if ($format == 'html') $output = view("feed/list_view.php", array('feeds' => $feeds));
}

Here in response to a request from the client for a feed list we first get the data from the model and second either output it as json or wrap it in a view. But if the view no longer needs the feeds array passed to it (as it is getting the feeds data via an AJAX request) it makes no sense for the view to be called after getting the data from the model.

So I think a clearer structure for the controller is to divide it into two parts:

The first part deals with html page requests and is essentially loading the client side application from the server to the client:

if ($format == 'html')
{
  if ($action == 'list') $output = view("feed/list_view.php", array());
  if ($action == 'view') ...
}

The second part placed directly below the above in the controller deals with the JSON API to the model

if ($format == 'json')
{
  if ($action == 'get') $result = get_feed(get('userid'),get('feedid'));
  if ($action == 'list') $result = get_user_feeds(get('userid'));

  $output = json_encode($result);
}

2) Straight mysqli instead of db.php abstraction

While rewriting the core framework from scratch it hit me that the db.php abstraction I created that converts mysqli class calls into global scope db_query etc functions is not really that useful and probably just confusing. db.php never did anything useful on top of mysqli like input sanitisation or anything like that so I think it would just be better to write straight mysqli.

Which leads on to the next point:

3) Models as classes

After using the mysqli class with the $mysqli->query() $class->method() type interface I started to experiment with using php classes for the emoncms models instead of just a file full of functions. Here's an example for the feed class with only one method for loading a users feed list (notice also how $mysqli is passed into the class for use)

class Feed
{
  private $mysqli;

  public function __construct($mysqli)
  {
    $this->mysqli = $mysqli;
  }

  public function list($userid)
  {
    $feeds = array();
    $result = $this->mysqli->query("SELECT * FROM feeds WHERE `userid` = '$userid');
    while ($row = $result->fetch_object()) $feeds[] = $row;
    return $feeds;
  }

}

To use this in the application we first create an instance of the class

$feed = new Feed($mysqli);

and then call the methods needed:

$result = $feed->list($userid);

This gives us a nice interface to the feed model in the rest of the application, it's a clearer naming convention model_name->method_name() and its clearer that model methods and properties belong to that model. There are also a whole load of other potential benefits as time goes on such as extending the class and so on (all standard stuff in most frameworks)

4) The fat model and thin controller

In reading more on the model view controller pattern I came across this article which really made a lot of sense to me: http://blog.astrumfutura.com/2008/12/the-m-in-mvc-why-models-are-misunderstood-and-unappreciated/

The question of what should be in the controller and what should be in the model is something that I had been a bit unsure about and so far I have usually put input validation and any error reporting in the controller while trying to confine the model to primarily data access. 

But looking again at this and with the clarity of that article, it makes sense to me that input validation and error reporting should be in the model instead.

When coupled with the class based model that model then becomes a very complete and portable class that can be used in different applications or frameworks as the article suggests with all the validation and error reporting intact.

The controller's role then becomes: translation of the external http api to model method calls , fetching of input via $_GET and $_POST and passing these to the model method parameters and checking to see if the user has the correct privileges to call the model method.

5) php code formatting standards 

Here's another interesting resource I came across only yesterday phptherightway.com. There's lots of valuable information on there including details on 4 standards including a code formatting standard for php produced by many of the large php frameworks and application projects, I think it would be good to adopt these in emoncms.

On the client 

6) Move all the user interfaces over to client side javascript

As mentioned above emoncms user interfaces are already largely constructed with client side javascript interacting with the server via AJAX requests but there are still several interfaces like the user account page that are constructed using php templating. I'd like to explore ways of modularising the client side code, making the code as clear as possible, it all gets rather complex and a bit messy there pretty fast at the moment. I'm also intrigued to explore AngularJS which Jean Claude Wippler is using as that looks like it might be a solution to some of the javascript jquery complexity woes that I have been having.

Next steps...

One of the good things about the server side changes proposed above is that many of them are only minor changes to existing code and they can be introduced incrementally, so we can run old code alongside new.

My plan is to start by completing the emoncms architecture documentation: how to build the emoncms framework from scratch then go on to convert the user module over to the controller and model design as detailed above and complete a nice javascript enabled user login/register page and a user account and profile page.


Air Quality Egg Sensor Shield

The Air Quality Egg Arduino Shield provides a lower cost way for those of you with a spare Arduino / Nanode(RF) to get started with monitoring air quality and joining in the global air quality crowd sourced data and discussion.

The Egg Shield is an Arduino shield with Temperature, Humidity, CO and NO2.

Air Quality Egg Arduino Sensor Shield
The sensor shield uses an ATtiny88 microprocessor to poll data from the sensors. 

To get started with the Sensor Shield follow these instructions

As always the hardware and software is totally open-source, the hardware PCB CAD design & schematic, ATtiny88 firmware and example Arduino sketches can be found on github: https://github.com/jmsaavedra/Air-Quality-Egg/

The Air Quality Egg Sensor Shield is now available in the OpenEnergyMonitor shop