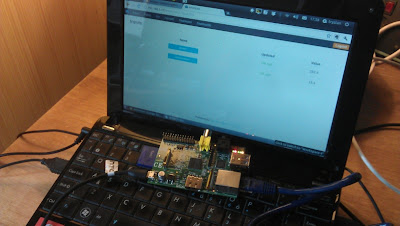
Installing emoncms on a raspberry pi
Update: we now have a more complete guide for installing emoncms on the Pi here: http://openenergymonitor.org/emon/emoncms/installing-ubuntu-debian-pi
Just got emoncms installed and running on the raspberry pi here, here are my installation notes:
1) Initial setup
Download the debian squeeze image from: http://www.raspberrypi.org/downloads and write to an SD card, following the guide here: http://elinux.org/RPi_Easy_SD_Card_Setup.
Insert the sd card into the pi, power it up connect up a screen, a keyboard and ethernet.
2) Enable SSH (optional)
You may at this point like to enable ssh in order to do the rest of the setup remotely from your 'normal' computer (running the pi in headless mode). I followed this guide, http://fusionstrike.com/2012/setting-ssh-ftp-raspberry-pi-debian. The main steps are:
$ sudo bash (Not sure if this is needed, apparently it is useful when performing a series of administrative tasks)
Crease a public RSA key:
$ ssh-keygen -t rsa
It will ask where you would like it saved and a pass-phrase, skip these questions by pressing enter. Once finished and the pattern has appeared enter the followin to enables ssh at boot:
$ sudo mv /boot/boot_enable_ssh.rc /boot/boot.rc
Then to start ssh:
$ sudo /etc/init.d/ssh start
Find the IP address of your pi ($ ifconfig -a) and then from your computer login to the raspberry pi via ssh, for example:
$ ssh [email protected]
(password: raspberry)
3) Update repositories
It may be worth making sure that all packages are up to date at this point:
$ sudo apt-get update
4) Install mysql
$ sudo apt-get install mysql-server mysql-client
When the blue dialog appears enter a password for root user, note the password down as you will need it later.
5) Install apache2
$ sudo apt-get install apache2
If apache fails to start (as it did for me) run the following:
$ sudo groupadd www-data
$ sudo usermod -a -G www-data www-data
6) Install php
$ sudo apt-get install php5 libapache2-mod-php5
$ sudo apt-get install php5-mysql
7) Enable mod rewrite
$ sudo a2enmod rewrite
$ sudo nano /etc/apache2/sites-enabled/000-default
Change (line 7 and line 11), "AllowOverride None" to "AllowOverride All".
Save and exit.
8) That completes the server installation, restart the server to make everything above operational:
$ sudo /etc/init.d/apache2 restart
Installing emoncms:
7) Install git (optional)
$ sudo apt-get install git-core
Follow this tutorial on creating keys etc:
http://help.github.com/linux-set-up-git/
Finally to download, in the /var/www folder type:
$ git clone [email protected]:openenergymonitor/emoncms3.git
Alternatively download emoncms and unzip to your server:
https://github.com/openenergymonitor/emoncms3
8) Create a MYSQL database
$ mysql -u root - p
Enter the mysql password that you set above.
Then enter the sql to create a database:
mysql> CREATE DATABASE emoncms;
9) Set emoncms database settings.
In the folder emoncms3/Includes rename default.settings.php to settings.php. In settings.php enter your mysql username (root) and password, host (localhost) and database name (if as above - emoncms).
10) In an internet browser, load emoncms:
http://YOURIP/emoncms3
That's should be it!
Next step is to get a jeelink running to receive and forward data from the emontx to the emoncms installation. Will update shortly.
To engage in discussion regarding this post, please post on our Community Forum.
$ sudo groupadd www-data
$ sudo usermod -a -G www-data www-data
6) Install php
$ sudo apt-get install php5 libapache2-mod-php5
$ sudo apt-get install php5-mysql
7) Enable mod rewrite
$ sudo a2enmod rewrite
$ sudo nano /etc/apache2/sites-enabled/000-default
Change (line 7 and line 11), "AllowOverride None" to "AllowOverride All".
Save and exit.
8) That completes the server installation, restart the server to make everything above operational:
$ sudo /etc/init.d/apache2 restart
Installing emoncms:
7) Install git (optional)
$ sudo apt-get install git-core
Follow this tutorial on creating keys etc:
http://help.github.com/linux-set-up-git/
Finally to download, in the /var/www folder type:
$ git clone [email protected]:openenergymonitor/emoncms3.git
Alternatively download emoncms and unzip to your server:
https://github.com/openenergymonitor/emoncms3
8) Create a MYSQL database
$ mysql -u root - p
Enter the mysql password that you set above.
Then enter the sql to create a database:
mysql> CREATE DATABASE emoncms;
9) Set emoncms database settings.
In the folder emoncms3/Includes rename default.settings.php to settings.php. In settings.php enter your mysql username (root) and password, host (localhost) and database name (if as above - emoncms).
10) In an internet browser, load emoncms:
http://YOURIP/emoncms3
That's should be it!
Next step is to get a jeelink running to receive and forward data from the emontx to the emoncms installation. Will update shortly.
